Warning giving heads up will have lots of pictures. All the words are under the picture that is shown.
Dont know the name of this purse I guess it's bucket that's what I keep seeing but, here go my bucket/oval bottom purse.
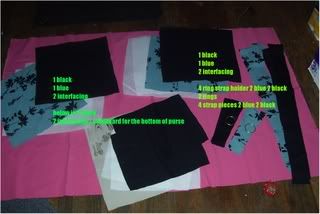
In this picture to the right and left part of the picture same fabrics 2 interfacing 1 blue 1 black fabric. So that makes it 2 black 2 blues.
I measure by eye so mainly you decide your measurements. Mainly a square is how I start off. Top of the purse is more longer then the sides.
Below is 2 black 2 infterfacing 1 cardboard for the bottom of the purse. I shape out my oval as I clip in the pins.
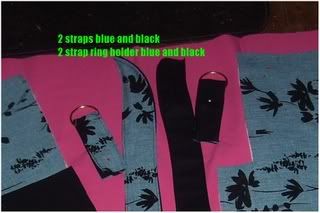
To the far right is 2 blue 2 black fabrics for the straps. 2 rings and 2 smaller fabrics 2 blue 2 black for the ring holder.
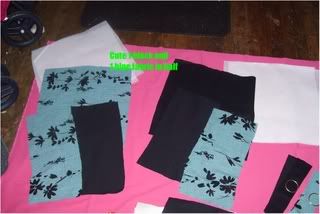
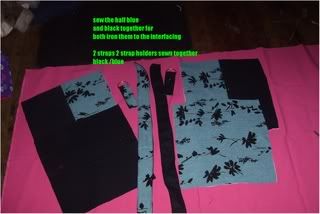
Here I cut in half 1 blue and 1 black fabric. This will be sewn together mix match.
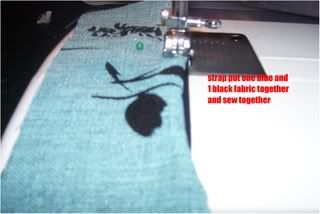
Strap: I take 1 blue and 1 black fabric line them up folding in the ends so you wont see the ruff edges and sew together. This also goes for the small strap holder pieces
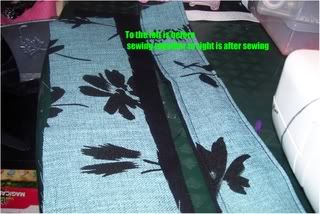
Left side before right side after
Straps: after sewn 2 small ring holders I put though the 2 rings.
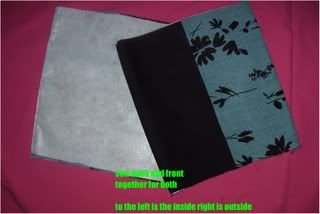
To your left will be the outside or shoot inside it's reversable. I just mix and match the blue/black and sewn them together and iron them open. For all fabrics I iron to the interfacing fabric.
To your left is where I sew up both sides ONLY I double sew it helps to have the purse last longer and also keep it flip inside out without the thread wearing out. To your right I turn out after sewing both sides. This will be the outside of the purse for now.
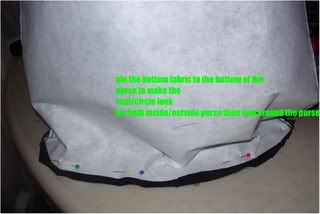
I then take the bottom fabric after ironing to the interfacing I then pin to the purse and cut around it taking away the fabric I don't need. Then I sew together. For the inside and outside pieces.
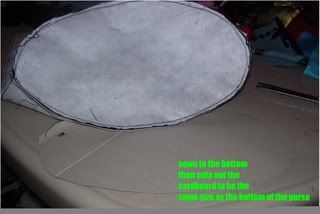
This the bottom of the purse. I also cut out the cardboard to size up with the bottom.
Put the cardboard at the bottom of the purse see now it holds up from the cardboard. I put a little hot glue on the card board so it can stick to the bottom of the purse so it wont move while reversing it over and over.
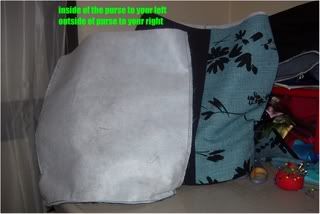
Put the bottom on the inside fabric also. To the left is the inside of the purse to the right is the outside. Wish ever side is never no wrong side when you is doing reversable.
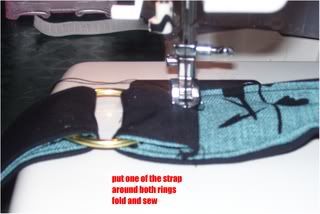
1 strap will be sewn to 2 rings as seen here in this picture. Fold in the edges and sew to hide the ruff edges.
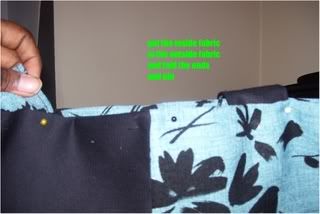
I then put the inside lining in the inside and fold in the edges making sure none of the edges of the fabric shows and pin it closed.
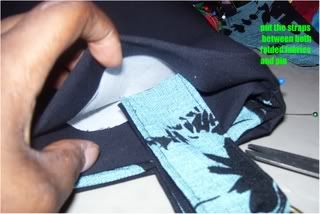
Here I open up the fabric to pin in my straps between both fabrics.
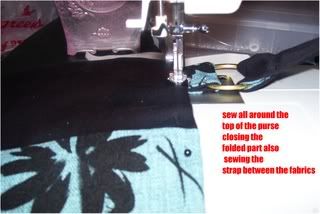
Here I sew all around the purse closing it.

Side 1 and back of side 1
Side 2 and back of side 2
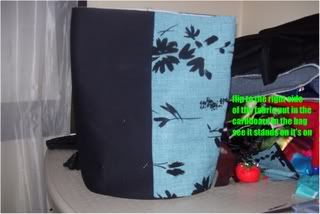
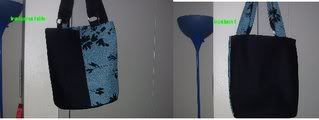
So there you have it a reversable purse with a oval bottom to it. You can reverse it as much as you like. :)
Thanks for looking you never know maybe you can try to make a purse. How you like it tried to do ever direction I could so hoping I didn't leave to much out. :)


3 comments:
Awesome tutorial!!
I will be trying this purse out. Thanks for the tutorial. I have so much fabric that I need to do something with. I think I will make purses and drawstring bags for gifts.
Great tutorial! It'll be fun to try. Thanks!
Post a Comment