Ok I start with one of my daughter's shirts. Since I was making a bolero I had to fold this shirt in half mainly giving the shirt a inch in a half from the sleeves. I used the shoulder line of her shirt to start my chain. I measured the shoulder to shoulder line on the shirt and that gave me 50 chains with a G hook. So that was my starting chain 50 chain. I used the back of the shirt for my guideline on how long I want her bolero.
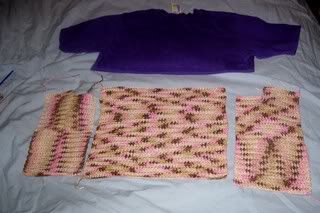
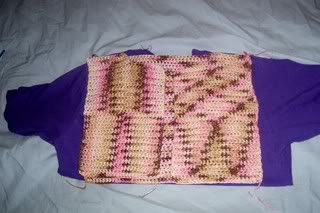
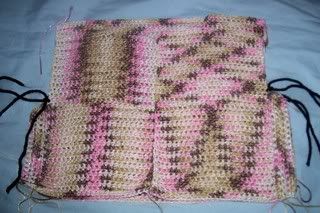
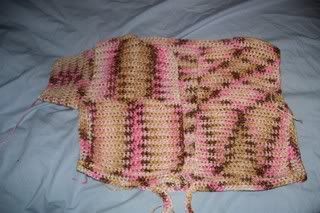
Here go a picture showing the back piece and the 2 front pieces. I gave the front pieces a little of a collar when you come to the top of the 2 pieces.
THE SHIRT ISN'T MY GUIDE ANYMORE NOW.
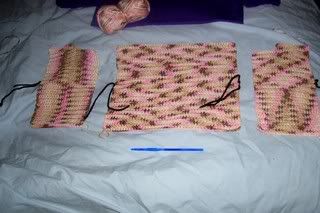
The black yarn on all four pieces measures where the arm hole will be. How I get this measurements I measure my daugther's arm and I got 7 1/2 so round that up to 8 inches. Since that 8 inches make the whole measurement of her arm to get the front and back pieces measure in half I say 8 divide by 2 and get 4 so that gives me 4 inches for the back piece and 4 for the front pieces. Where you see the yarn is 4 inches from the top pieces.
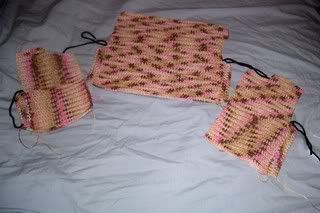
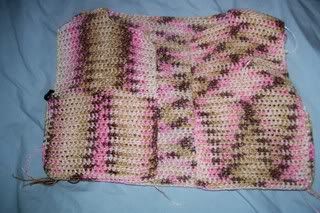
Now depending on how you like the bolero to fit is how you will determind how many crochet rows you will do on each sides. This picture shows that I did 4 crochet rows on the sides where the black yarn is. This gives you a arm hole. I did 4 on both sides of the back and on the front pieces.
Close up picture show you where those 4 rows are. If you measured right all your black yarn should match up with each other when you put the front pieces on top of the back pieces.
Now you have to flip your pieces on the other side having the outside facing in so you can crochet your pieces close. Crochet the side pieces leaving room for the arm holes and also crochet the top part where the shoulders will be. Crocheting it to me is better then weaving it close because when you keep putting it on and taking it off the yarn tends to pull and loose up so by crocheting it close helps to not pull away.
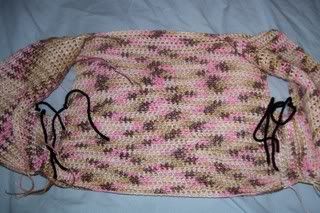
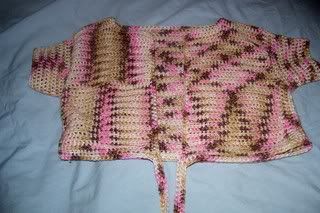
It would look like this after you crochet them close.
This picture shows that I added a tie string. To add the tie string I chain 31 then on my 32 stitch I added it to one of the front bottom pieces of the bolero then crochet around the bottom until I got to the other side I then chain 31 again then work that chain back all the way around to the other side. That is 2 rows of crochet stitches worked around the bottom of the bolero.
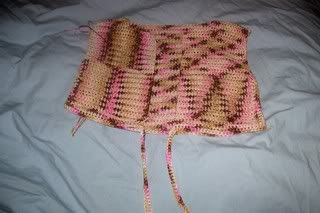
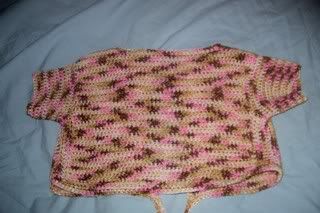
Here go a picture where I start the first sleeve. Some people crochet the sleeves then add it on later. I don't like how that look to me because mines never seem to come out right so. Since I made those 4 rows I mainly made a arm hole that measures in 4 inches just right for my daughter's arm. So I use the arm hole and worked in the round. Hope I am writing this right.
Row 1 of the sleeve - work in the round
Row 2-3 skip one crochet stitch under the arm pit and another at the top where the shoulder is
That to me gives it that more of arm like look and not box like look.
Row 4-5 work in the round
Row 6 skip one crochet stitch under the arm pit and another at the top where the shoulder is
Row 7-12 work in the round
Now if I wanted to go more I just keep working in the round I will put the bolero on my daughter to see where I am with the sleeve when I get down to the elbows I will start decreasing ever other row until I like how it looks on her arms.
Make sure you do both arms the same.
Here go the finished project. I also crochet around the collar and down the front pieces to give it that finish look. Here is the front.
Back
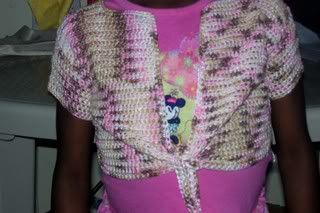
Front. I want her to wear this shirt with a cream color shirt under it.
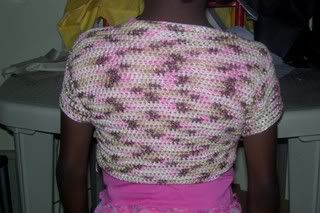
Back.

Here go Nesa all shocked and suprised lol :)
Thanks for looking. I thought by me giving step by step for those that always wanted to crochet there own clothes but, never had patterns that you surely can do it just grab your yarn and get crocheting. Because I know I didn't use a pattern and it is hard at first but, you will get the hang of it. Thanks for looking. :) love comments. So what do you all think of my daughters neopolitan ice cream bolero?


11 comments:
You have another winner!
I remember seeing all of your things on Crochetville too! I am new to the blogging world so I still have a LOT to learn. Thanks for stoping by my page.
BTW ~ I love your work!
Thanks for showing how to make a wearable without a pattern. I am from India and there are less(if not none) patterns available here!!! You have truly inspired me to make my own!!! and oh yeah I too came here from reading your post at the crochet ville:) Great work!
Wow, you know how to make the most wonderful things with crochet! I really love the house shoes! To bad I don't crochet very well, just plain simple forward is all I can do.
Thank you for visiting my blog.
That looks good - but so much work and time on it!
Another great project you've made for your daughter. Your hook is on fire.
The new bolero turned out so cute! It looks great on your daughter. Amazing! You do such great work!
Great job!!Okay I am going to have to try that out for my dd.
have a great weekend!!
Cute projects... I know your hooks are smoking...lol. I need to make me some crochet slippers.
wow you are a very talented woman! all your things look lovely. thank you for sharing!
and p.s. thank you for stopping by my blog and leaving that nice comment :)
You know what, lady. You just gone 'head with your bad self.
Kudos to you, missy. ;-)
Post a Comment